
Today in this article we are going to talk about TunesKit AceMovi video editor. TunesKit AceMovi movie video editor is best suitable for those peoples who are
linked with video editing in the video creating industry it helps you a lot for making any type of video either animation video or promotional video for your clients. You also can use it for making any social media platform video either for YouTube Facebook or any other platform. According to my experience, the Tunes kit movie editor is great for beginners who need some Advanced functionality for video editing. It is similar to wondershare and filmora video editing tools. It is natural and easy for beginners and also allows them to do much more. TunesKit AceMovi video editor is available for both Windows and Mac, the setup size of the software for Windows is 60.8Mb and the setup size of the software for Mac is 74.5Mb you can visit its
official website and download the TunesKit AceMovi video editor let us now show you how to use the editor for video editing.
Screen Recorder
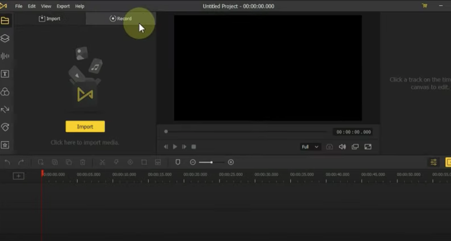
You can see the record option on the top right of the media click on the record button for screen recording using TunesKit AceMovi movie video editor. It gives you a lot of settings, you can adjust different types of settings if you wish. When you want to stop recording you can easily stop the recording and save the recording as video.
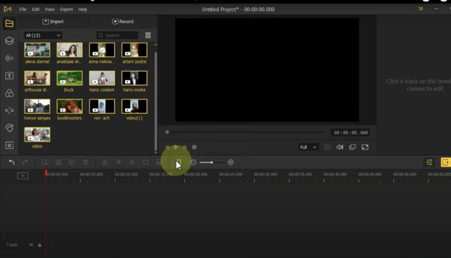
Import Footage
You can import a lot of footage into a TunesKit AceMovi movie video editor simultaneously in different ways click the media import Button, select files from any folder and click open, another way to import footage click the import button on the top left of the media and import footage from any folder and the third method is drag directly from any folder to TunesKit AceMovi movie video editor. You can easily add footage to timeline footage by drag and drop method.

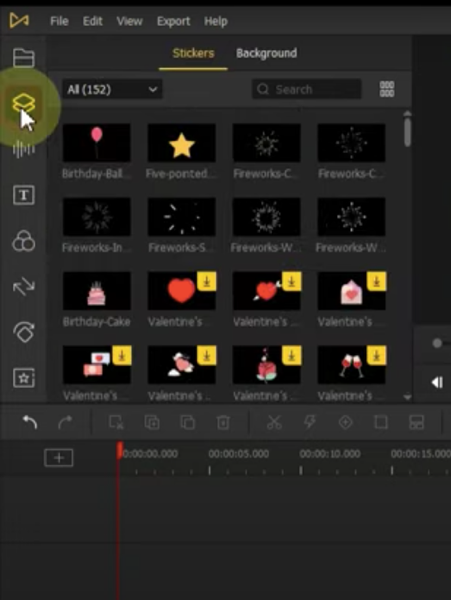
Elements
On the left side of the software you can see that there are many tabs in this video editor tool. Now we are going to discuss about all the tabs, the second tab we have is elements there are too many elements in this tab you can apply it to video drag
and drop any element on the timeline you can easily make it bigger or smaller
on the display screen. It also contains some of the elements that you will download, turn on the internet connection and click on the download icon. These elements can be used after downloading.
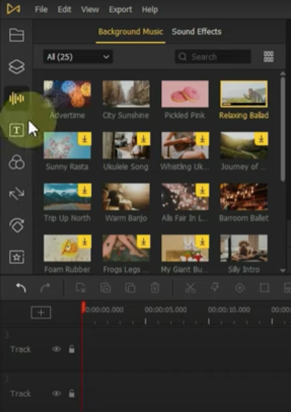
Audio
The third tab is for audio. There are many audio tracks, we can use these tracks by drag and drop into the timeline. You can put these audio tracks in the
background of any of your videos. Split the extra audio and press the
delete button from the keyboard. When you click an audio, you will see audio settings on the right side.
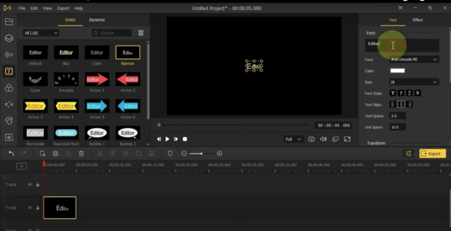
Text
The fourth tab is a text tab containing some nice text samples in this tab that can be easily dragged to the timeline and easily adjustable. Click on the text and at the top right of the timeline you can adjust all the settings for the text in the first box of text
you can edit the text and write something else, you can increase or decrease the font size. You can change the font colour easily, and can also change the font style.
you can create spaces between text in the effects tab of the text you can make the text bigger and smaller. You can also increase or decrease the duration of the text in the timeline.
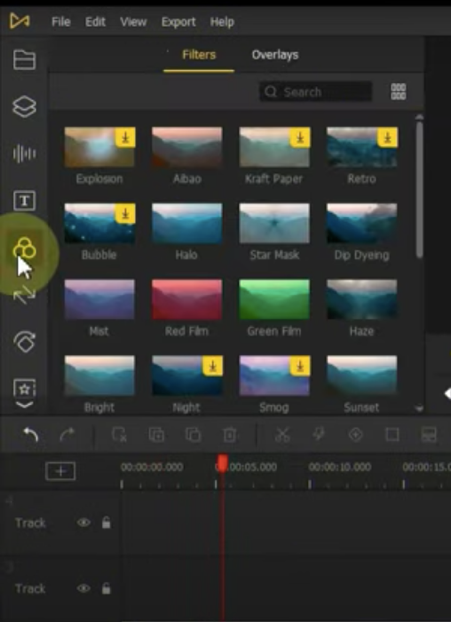
Effects
in the fifth tab we have the effects for adding into videos. There are many more unique effects that really enhance your video. The Effects can be easily drag
and drop into the video timeline. Remember that the video should be in the
bottom track and the effects in the top.
Transitions
Video transition is a post-production technique used in video editing or film to connect one shot to another. Often when a filmmaker wants to join Two Shots together they use a basic cut where the first image is immediately replaced by the next. The tool has a lot of professional and beautiful transitions which I really liked these transitions. These transitions allow you to promote your video much further drag between any two footages on the timeline and make the footage beautiful
Animations
The seventh tab has two types of Animation effects one is called motion and the other is called animations both motion and animations are very easy to use just drag and drop on the video
Regional
For the eighth and Ninth tabs you have to click the scroll down button below
the tabs so that you can see the tabs below inside the regional you will see
amazing effects. You can easily drag and drop these effects and can apply into the video.
Split screen
The ninth tab has a lot of amazing split screens you will amazed to see so many
amazing split screens. If you drag and drop any of these footage into a box it will be put in the split screen. You can adjust the different settings of the video you dragged in the split screen.
Export
Once the video editing is complete then you need to save the video. For
that you have to click on this export button when you click the export button a page like you see in the image below will open. Here you can save videos in different video formats
FAQs (Frequently Asked Questions):
- What is TunesKit AceMovi video editor?
- TunesKit AceMovi video editor is a versatile tool designed for individuals involved in video editing, catering to both beginners and those with advanced needs in the video creation industry.
- What types of videos can be created using TunesKit AceMovi?
- TunesKit AceMovi supports the creation of various types of videos, including animation videos, promotional videos for clients, and content for social media platforms like YouTube and Facebook.
- Is TunesKit AceMovi suitable for beginners?
- Yes, TunesKit AceMovi is considered great for beginners due to its natural and easy-to-use interface. It provides advanced functionality while being similar to other popular video editing tools like Wondershare and Filmora.
- Which operating system is TunesKit AceMovi compatible with?
- TunesKit AceMovi Best vedio editing tool is available for both Windows and Mac.
- What is the setup size for TunesKit AceMovi on Windows and Mac?
- The setup size for the Windows version is 60.8MB, while the Mac version is 74.5MB.
- How can I record my screen using TunesKit AceMovi?
- You can find the screen recording option at the top right of the media interface. Click on the record button, adjust settings as needed, and stop the recording when finished.
- How can I import footage into TunesKit AceMovi?
- You can import footage in multiple ways, including using the media import button, selecting files from a folder, or dragging and dropping directly from any folder to the editor.
- What elements are available in the Elements tab, and how can they be used?
- The Elements tab contains various elements that can be applied to videos. Users can drag and drop these elements onto the timeline, adjusting their size on the display screen.
- How can I add audio to my videos in TunesKit AceMovi?
- The Audio tab provides multiple audio tracks that can be added to the timeline through drag and drop. Users can adjust audio settings on the right side of the interface.
- What export options are available in TunesKit AceMovi?
- After completing video editing, users can click on the export button to save the video. The software offers options to save videos in different video formats.
Conclusion:
In conclusion, TunesKit AceMovi video editor offers a user-friendly experience for both beginners and more advanced users in the video creation industry. With features such as screen recording, versatile import methods, a variety of elements, audio tracks, effects, transitions, animations, regional effects, split screens, and flexible export options, it provides a comprehensive suite for creating engaging and professional videos. Whether you’re editing for social media or client projects, TunesKit AceMovi proves to be a valuable tool with a range of functionalities.


